Stepping into the world of gas stove installation can seem like a daunting task, filled with technicalities and safety concerns. Yet, with the right knowledge and a meticulous approach, installing your own gas stove can be a perfectly manageable DIY project, transforming your kitchen with responsive heat and precise control. This guide will walk you through every critical step, from choosing the right appliance to the final safety checks, empowering you to achieve a safe and successful installation.
Choosing the Right Gas Stove for a Smooth Installation
Before you even think about wrenches and gas lines, the journey to a safely installed gas stove begins with making informed choices about the appliance itself. Understanding the different types and what to look for can significantly smooth the installation process.
What is a Gas Stove? An Overview of Modern Kitchen Choices
|
Our Picks for the Best Gas stove in 2026
As an Amazon Associate I earn from qualifying purchases.
|
||
| Num | Product | Action |
|---|---|---|
| 1 | Gas One Portable Butane Camping Stove with Case: Automatic Ignition, Precise Heat Control - Camping & Tailgating and Outdoor Cooking |

|
| 2 | GE 30-Inch Freestanding Gas Range with 4 Sealed Burners, Standard Clean Oven, Black |
|
| 3 | Horynar Propane Stove 2 Burner Gas Stove Auto Ignition 26000 BTU Tempered Glass Propane Burner LPG with CSA Hose for Outdoor Cooking, Emergency |
|
| 4 | Vivicreate High Pressure Propane Gas Outdoor Camping BBQ Grill Stove Burner Estufas de Gas para Cocinar Afuera Es gas propano Regulator 20 PSIG |
|
| 5 | Vivicreate 2 Burner Propane Stove, [20000 BTU] Portable Camping Gas Cooktop with Auto Ignition, Stainless Steel Outdoor Cooker with Regulator & Hose for RV, Backyard, Camping and Emergency Use |
|
| 6 | AMZCHEF 17 Inch 3-Burner RV Gas Range with 1.24 Cu.Ft Oven, High Output Propane Stove for Mobile Home, Camper, Apartment, Stainless Steel |
|
| 7 | GasOne 200K BTU Propane Burner – Heavy-Duty Propane Stove – Outdoor Burner with Adjustable 0-20Psi Regulator and Steel Braided Hose – Ideal for Home Brewing, Turkey Fry |
|
| 8 | Gas One Propane Double Burner Two Burner Camp Stove Outdoor High Pressure Propane 2 Burner Adjustable PSI Regulator and 4ft Hose With Removable Legs |
|
| 9 | GasOne High Pressure Single Propane Burner - Outdoor Cooking with Heat Shield and Guard – Propane Burner Head for Camping, Tailgating, Seafood Boil, Home Brewing - Patented |
|
| 10 | Gas One GS-3400P Propane or Butane Stove Dual Fuel Stove Portable Camping Stove - Patented - with Carrying Case Great for Emergency Preparedness Kit |
|
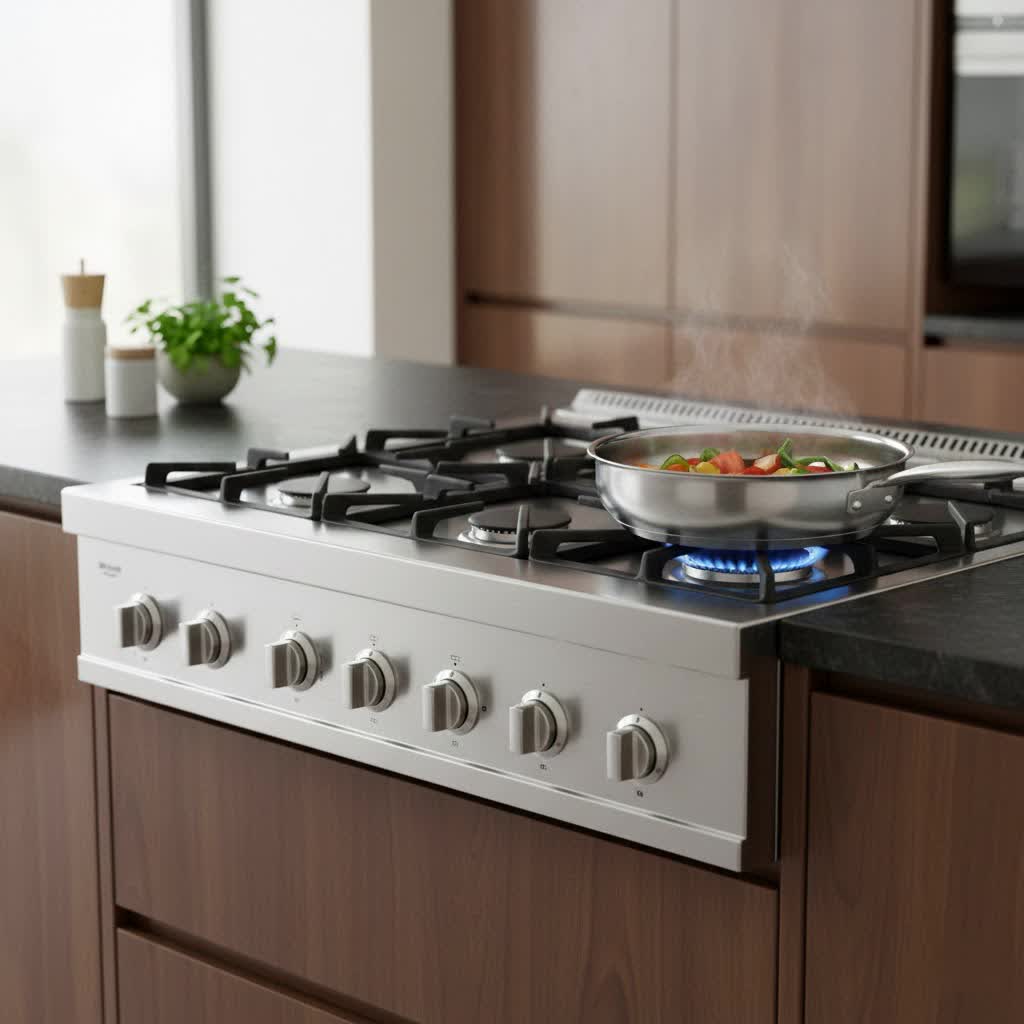
A gas stove is a kitchen appliance that uses natural gas or propane as its fuel source, delivering instant heat to burners and ovens. Beloved by home cooks and professional chefs alike, gas stoves are celebrated for their precise temperature control and visible flame, which allows for immediate adjustments during cooking. Unlike electric models, gas stoves require a dedicated gas line connection, which is the primary consideration during installation. Modern gas stoves come in various styles, from freestanding ranges to sleek cooktops, each with specific installation requirements that must be understood from the outset.
Types of Gas Stoves and Installation Considerations
Gas stoves aren’t one-size-fits-all, and their design directly influences the installation process.
- Freestanding Ranges: These are the most common type, designed to fit between cabinets with finished sides. Installation typically involves sliding them into an existing opening and connecting to the gas and electrical (for ignition) lines. They often come with an anti-tip bracket.
- Slide-in Ranges: Similar to freestanding but designed for a custom, built-in look, often sitting flush with countertops. They may require more precise cutout dimensions and a different connection location at the back.
- Cooktops: These units are installed directly into a countertop cutout, with controls either on the surface or a separate panel. Their installation focuses solely on the burner unit and its gas connection, often requiring careful sealing and secure mounting to the counter.
- Wall Ovens: While not a “stove,” gas wall ovens also require gas line installation. They fit into custom cabinet cutouts and typically demand professional installation due to the complexity of cabinet integration and gas/electrical routing.
When considering materials, choices like stainless steel or glass tops don’t significantly alter the installation but impact the weight and handling during placement. Ignition systems (like electronic spark ignition) require an electrical outlet, which is a key planning point. Always consider built-in safety features like automatic gas shut-off valves in your selection, as these enhance home safety.
Expert Tips for Selecting Your Gas Stove
Making the right choice before installation saves time and prevents headaches. Here’s what the pros recommend:
- Measure Meticulously: Accurately measure your kitchen cutout (width, depth, height) and the new stove’s dimensions. Ensure proper clearances for surrounding cabinets and walls. A typical freestanding range may need 75 cm clearance from the top to overhead cabinets and 30 cm on each side if flammable materials are present.
- Verify Gas Type: Confirm whether your home uses natural gas or propane. Stoves are designed for one or the other, or come with a conversion kit. Mismatching can be dangerous and inefficient.
- Check Local Codes and Regulations: Before purchasing, consult local building codes. Some areas require professional installation or permits for gas appliances. Being compliant from the start is essential for safety and legal reasons.
- Anti-Tip Bracket: Ensure your chosen stove comes with an anti-tip bracket. This is a critical safety device designed to prevent the range from tipping forward when heavy pots are placed on an open oven door or if a child stands on it.
- New Flexible Gas Connector: Always plan to purchase a new, gas-rated flexible connector. Never reuse an old one, as they can degrade and lead to leaks.
- Read the Manufacturer’s Manual: Familiarize yourself with the specific installation instructions for your new stove model. Every appliance has unique quirks and requirements.
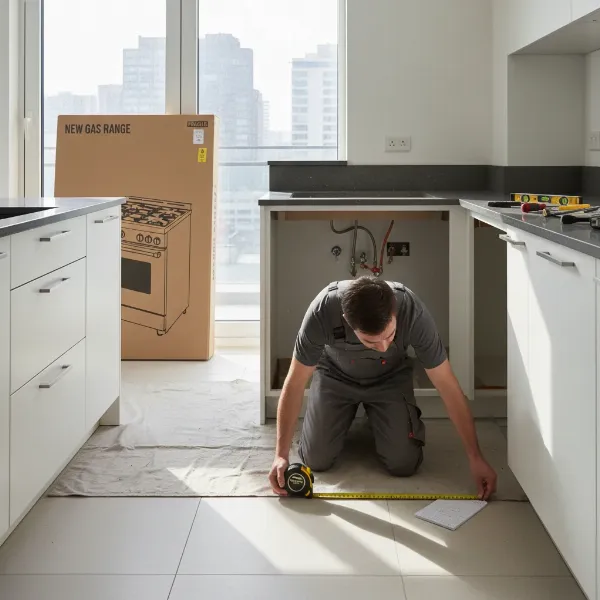 A person carefully measuring kitchen dimensions before installing a gas stove, highlighting planning and precision.
Your Comprehensive DIY Gas Stove Installation Guide
Once you’ve made your selection, it’s time to roll up your sleeves and get to work. This step-by-step guide prioritizes safety, ensuring your gas stove is installed correctly and securely.
Essential Tools and Materials for a Safe Setup
Before you begin, gather everything you’ll need. Having the right tools and materials on hand is crucial for a smooth and safe installation.
Tools:
- Adjustable wrench (or pipe wrench)
- Screwdriver set (Phillips and flathead)
- Level
- Measuring tape
- Flashlight
- Utility knife (for opening boxes)
- Work gloves
- Safety goggles
Materials:
- New flexible gas connector (gas-rated, correctly sized, typically ½ inch diameter)
- Gas-rated pipe thread sealant or yellow Teflon tape
- Gas leak detector spray (or dish soap and water for a homemade solution)
- Anti-tip bracket (should be included with your new stove)
- Fire extinguisher (always a recommended safety precaution in the kitchen)
- Cardboard or floor protection (to avoid scratches when moving the stove)
- New shut-off valve (if your current setup lacks one or needs replacement)
Critical Pre-Installation Safety Steps
Safety is paramount when working with gas. These steps are non-negotiable before touching anything.
- Turn Off the Gas Supply: Locate the main gas shut-off valve for your home or the specific valve for your stove (often behind or near the appliance). Turn it to the “off” position, usually perpendicular to the pipe. Double-check there’s no gas flow.
- Turn Off Electrical Power: For stoves with electronic ignition, clocks, or lights, unplug the stove or turn off the circuit breaker that supplies power to the outlet.
- Review Manufacturer’s Manual: Read the installation instructions that came with your specific gas stove model thoroughly. Pay close attention to any unique requirements, clearances, or warnings.
- Check Local Regulations: Reconfirm that your DIY installation complies with all local building codes and regulations. Some jurisdictions may require inspections or professional sign-offs.
- Clear the Workspace: Remove any items from the area around the stove, ensuring you have ample room to work safely and move the appliance without obstruction. Ensure adequate ventilation in the kitchen.
Disconnecting and Removing Your Old Stove (If Applicable)
If you’re replacing an existing gas stove, this is your first hands-on step.
- Unplug Electrical Cord: If your old stove has an electrical cord, unplug it from the wall outlet.
- Disconnect Gas Line: Using your adjustable wrench, carefully disconnect the old flexible gas connector from the shut-off valve and the stove’s inlet. Be prepared for a small amount of residual gas in the line. Inspect the existing gas hookup for any signs of wear, corrosion, or damage, and address them before connecting the new stove.
- Remove Old Stove: Slowly and carefully slide the old stove away from the wall. If it’s heavy, enlist help from another person to prevent injury or damage to your flooring. Use cardboard or other protection to safeguard your floors.
Installing the Anti-Tip Bracket
This small but vital component prevents your stove from tipping over, a common cause of serious accidents, especially in homes with children or pets.
- Locate Installation Spot: The anti-tip bracket typically screws into the floor or wall behind the stove. Consult your stove’s manual for the precise location and height.
- Secure the Bracket: Using the provided screws and a screwdriver, firmly attach the bracket according to the manufacturer’s instructions. Ensure it’s level and robust enough to hold the stove’s rear leg or securing mechanism.
Making the Gas Line Connection Securely
This is the most critical step for gas safety. Precision and proper materials are essential.
- Prepare Threads: Wrap the threaded ends of the gas shut-off valve and the stove’s gas inlet connection with gas-rated yellow Teflon tape (two to three wraps clockwise) or apply gas-rated pipe thread sealant. This ensures a leak-proof seal.
- Connect Flexible Gas Line: Attach one end of the new flexible gas connector to the shut-off valve and the other end to the stove’s gas inlet. If your stove requires a street elbow to properly orient the connector, install that first onto the stove’s gas port, then connect the flexible line to the elbow.
- Tighten Connections: Use your adjustable wrench to tighten both connections. They should be snug and secure, but do not overtighten, as this can strip threads or damage fittings, leading to leaks. The connection should be tight enough that it won’t move by hand.
- Ensure No Kinks: As you connect, ensure the flexible gas line is not twisted, kinked, or pinched, which can impede gas flow or cause damage.
Positioning, Leveling, and Final Placement
With the gas line connected, it’s time to carefully move your new stove into its final position.
- Slide Into Place: Slowly and carefully slide the new stove back into the cutout space. As you move it, watch the gas line to ensure it doesn’t get kinked or crushed. Make sure the stove’s rear leg slides into the anti-tip bracket, securing the appliance.
- Level the Stove: Use a level to check that the stove’s surface is perfectly flat. Uneven stoves can lead to uneven cooking and pots sliding off. Adjust the leveling legs at the bottom of the stove as needed until it is stable and level.
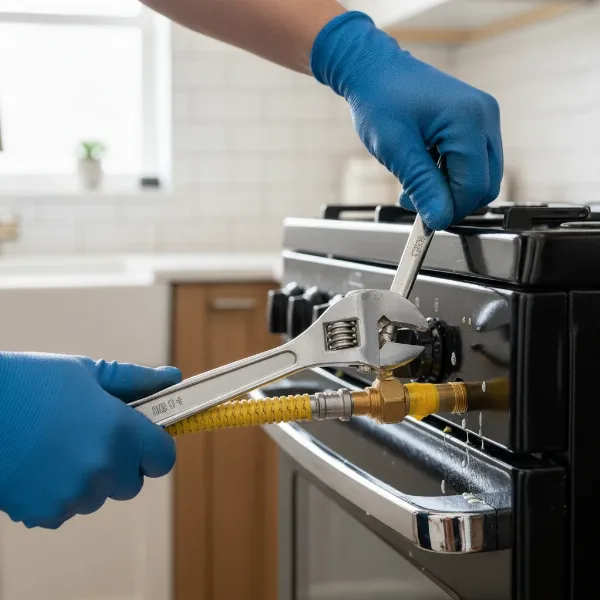 A close-up of a hand connecting a flexible gas line to a gas stove, demonstrating the use of a wrench and safety tape.
The Vital Gas Leak Detection Test
This step is absolutely crucial. Never skip it.
- Turn On Gas Slowly: Once all connections are made and tightened, slowly turn the main gas shut-off valve back to the “on” position.
- Apply Leak Detector: Mix a small amount of dish soap with water to create a generous soapy solution, or use a commercial gas leak detector spray. Apply this mixture to all gas line connections you just made.
- Watch for Bubbles: Carefully watch for bubbles to form at the connection points. If you see any bubbles, no matter how small, it indicates a gas leak.
- Rectify Leaks: If you detect a leak, immediately turn off the gas supply. Tighten the problematic connection slightly, reapply the leak detection solution, and test again. Repeat until no bubbles appear. If a leak persists, turn off the gas and call a certified gas technician immediately.
> “Never use an open flame, such as a match or lighter, to check for gas leaks. This is extremely dangerous and could lead to a fire or explosion.” – Mia, Certified Gas Appliance Technician - Use a Handheld Detector: For added peace of mind, use a handheld gas leak detector to scan around all connections and the area behind the stove.
Power Up and Test Your New Stove
With the gas line secured and leak-free, it’s time for the final checks.
- Plug In Electrical: Plug the stove’s power cord into a grounded electrical outlet.
- Test Burners: Turn on each burner individually. Listen for the characteristic clicking sound of the ignition and observe the flame. It should ignite smoothly and burn with an even, blue flame. If the flame is weak, flickering yellow, or doesn’t ignite, turn off the burner and consult the troubleshooting section or your manual.
- Test Oven: If your stove has a gas oven, test it by setting it to a low temperature and observing the burner ignition and heat production.
Beyond Installation: Safe Operation, Maintenance, and Troubleshooting
Installing your gas stove safely is a significant achievement, but ensuring its long-term safety and performance requires proper usage and regular maintenance. Knowing how to troubleshoot common issues can also save you time and potential professional service calls.
Operating Your Gas Stove Safely Day-to-Day
Safe operation extends beyond installation. Follow these guidelines for a secure kitchen environment:
- Maintain Clearances: Always ensure that there is sufficient space around your stove. Avoid placing flammable materials like curtains, dish towels, or paper products too close to the burners or oven vents.
- Proper Ventilation: Gas stoves produce combustion byproducts, including carbon monoxide. Always use your range hood or ensure adequate ventilation (e.g., opening a window) when cooking, especially when using high heat or for extended periods.
- Install Carbon Monoxide Detector: A carbon monoxide (CO) detector is an inexpensive but life-saving device. Install one in your kitchen or near sleeping areas to alert you to any odorless, colorless, and dangerous CO leaks.
- Child Safety: If you have children, consider burner knob covers and ensure the anti-tip bracket is correctly engaged to prevent accidents.
Essential Maintenance for Longevity and Safety
Regular maintenance keeps your gas stove running efficiently and prolongs its lifespan.
- Clean Burners Regularly: Food spills and debris can clog burner ports, leading to uneven flames or ignition issues. Remove burner caps and grates, clean them thoroughly, and ensure burner ports are clear.
- Inspect Gas Connections Annually: Periodically check all gas connections, including the flexible line, for any signs of wear, kinks, or corrosion. Reapply the soapy water leak test annually to ensure continued integrity of the seals.
- Check Ignition System: For electronic ignition systems, keep the igniter ports clean. If you use pilot lights, ensure they are consistently lit and burn with a steady blue flame.
- Keep Ventilation Clear: Regularly clean your range hood filters and ensure that any external vents for your kitchen are free from obstructions to maintain proper airflow.
- Annual Professional Check: Even for the most confident DIYer, an annual inspection by a certified gas technician is highly recommended. They can verify gas pressure, check for hidden leaks, and ensure all components are operating safely and efficiently.
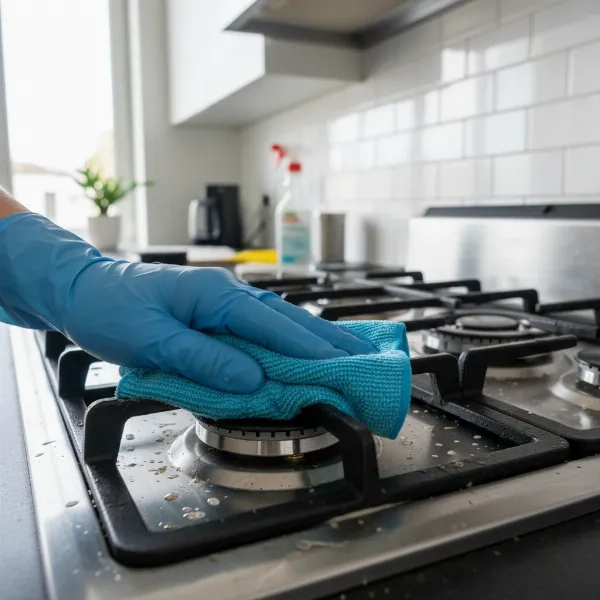 A hand cleaning a gas stove burner with a cloth, emphasizing routine maintenance and cleanliness.
Common Gas Stove Problems and When to Call a Professional
Some issues can be resolved at home, while others require expert intervention.
- Burners Not Lighting:
- Check: Ensure gas is on, igniter is clean, and power is supplied.
- Fix: Clean igniter, ensure burner caps are correctly seated.
- Professional: If gas is on and igniters are clean but still no ignition across multiple burners, there might be a gas supply or ignition module issue.
- Weak or Yellow Flame:
- Check: Burner ports might be clogged.
- Fix: Clean burner ports thoroughly.
- Professional: If cleaning doesn’t help, it could indicate incorrect gas pressure or air-to-gas mixture issues, requiring professional adjustment.
- Smelling Gas:
- Action: Immediately turn off the gas supply, open windows and doors, evacuate the area, and call your gas company or emergency services.
- Professional: Any persistent gas odor, especially after installation or if the leak test was positive, requires immediate professional attention. Never try to find the source of a strong gas smell yourself with a flame.
- Gas Leak (detected by bubbles):
- Action: Turn off the gas supply, tighten the connection (without overtightening), re-test with soapy water.
- Professional: If the leak persists after re-tightening, or if you are unsure, call a professional. Gas leaks are not to be taken lightly.
- Unfamiliar or Complex Gas Piping: If your home’s gas line setup is unusual, requires modifications, or extends beyond the immediate stove connection point, it is always safer to consult a certified gas technician.
Conclusion
Installing a gas stove safely in your home is a rewarding DIY project that offers both financial savings and a deep understanding of your kitchen appliance. By diligently following each step—from meticulous planning and gathering the right tools to executing the installation with precision and, most importantly, rigorously testing for leaks—you can confidently bring the joy of gas cooking into your home. Remember that while many aspects are DIY-friendly, recognizing when to call a professional for complex issues ensures ultimate safety. A well-installed gas stove provides years of reliable service and delicious meals, but its safety always begins with your careful attention during installation. What steps will you take to ensure your gas stove installation is not only functional but impeccably safe?
Frequently Asked Questions
Is it safe to install a gas stove yourself, or should I hire a professional?
It can be safe to install a gas stove yourself if you are meticulous, follow all safety guidelines, local codes, and manufacturer instructions carefully, especially concerning gas line connections and leak testing. However, if you’re unsure about any step, if a new gas line needs to be installed, or if local regulations require it, hiring a certified professional is the safest option.
What are the most important safety precautions for gas stove installation?
The most critical safety precautions include: always turning off the main gas supply before starting work, using a new, gas-rated flexible connector, applying gas-rated pipe thread sealant or Teflon tape, installing the anti-tip bracket, and thoroughly checking all connections for leaks with soapy water or a gas leak detector before operating the stove. Never use an open flame to check for leaks.
How do I check for gas leaks after connecting a new stove?
To check for gas leaks, slowly turn on the gas supply valve and then apply a mixture of dish soap and water (or a commercial leak detection spray) to all gas line connections. Watch for bubbles; their presence indicates a leak. If bubbles appear, turn off the gas, tighten the connection, and re-test until no bubbles are visible.
Do I need to install an anti-tip bracket with my gas stove?
Yes, installing an anti-tip bracket is a mandatory safety measure for all freestanding and slide-in gas ranges. This bracket prevents the stove from tipping forward, which can cause severe burns or injuries, especially if children open the oven door and stand on it or if heavy items are placed on an extended oven rack.
How often should I have my gas stove professionally inspected after installation?
It is highly recommended to have your gas stove and gas line connections professionally inspected annually. A certified gas technician can perform comprehensive checks for leaks, verify gas pressure, ensure proper ventilation, and address any potential issues that might not be obvious during routine home inspections, contributing to long-term safety and efficiency.