Does your gas stove produce uneven, weak, or yellowish flames? This common kitchen frustration not only impacts your cooking efficiency but can also pose safety risks. Clogged gas burner ports are often the culprit, disrupting the perfect gas-air mixture needed for a clean, strong flame. Fortunately, restoring your stove to optimal performance is a straightforward task you can tackle yourself with a few simple tools and careful attention. This guide will walk you through the process of clearing those stubborn blockages, ensuring your gas burners deliver consistent, even heat every time.
Why Do Gas Burner Ports Get Clogged? Understanding the Root Causes
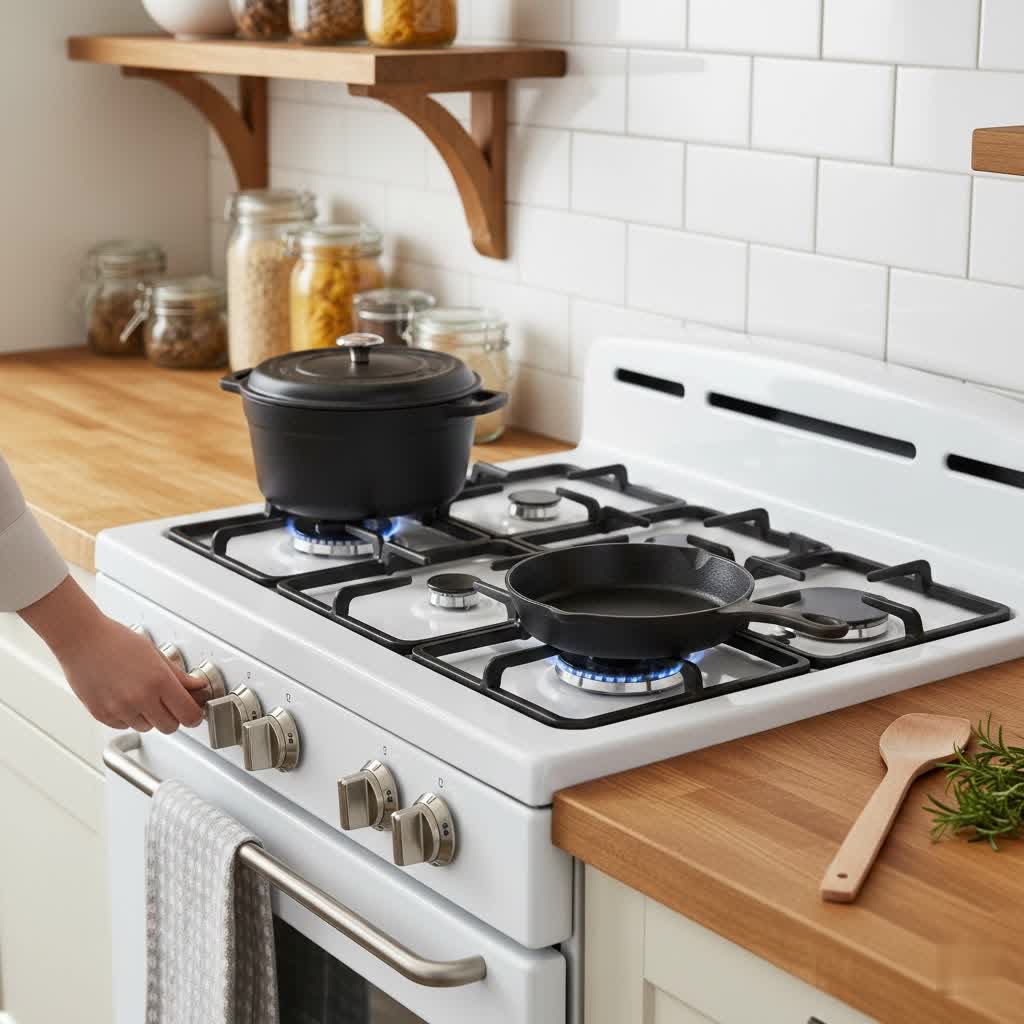
Gas burner ports are tiny openings that allow gas to mix with air and ignite, producing a clean blue flame. Over time, these small holes can become obstructed, leading to inefficient and uneven heating. The most common culprits include food spills and debris, such as sauces boiling over or grease splattering during cooking. These residues can dry and harden, forming a formidable barrier.
Excess moisture, whether from cleaning or accidental spills, can also contribute to blockages or temporarily impede gas flow. Additionally, burner caps that are misaligned can disrupt the natural gas and air mixture, causing performance issues. In some cases, a clogged orifice (the central opening where gas exits the manifold) or even internal rust and corrosion can restrict proper gas flow, leading to a diminished flame.
The Importance of Clear Burner Ports: Safety and Efficiency
Maintaining clear gas burner ports extends beyond mere cooking convenience; it is crucial for both safety and efficiency in your kitchen. When burner ports are clogged, the gas-air mixture becomes unbalanced, leading to incomplete combustion. This often manifests as yellow or orange flames instead of the ideal steady blue flame. Incomplete combustion is a significant safety concern because it can produce carbon monoxide, an odorless and colorless gas that is hazardous if accumulated in an enclosed space.
Beyond safety, clogged ports severely impact your stove’s efficiency. Uneven flames mean wasted gas, as the heat isn’t distributed effectively, leading to longer cooking times and unevenly cooked food. A properly functioning burner ensures that gas is consumed efficiently, reducing energy waste and providing consistent, powerful heat for all your culinary needs. Ensuring your flames are consistently blue and strong is the best way to confirm your stove is operating both safely and effectively.
Essential Tools You’ll Need for Unclogging Gas Burner Ports
Before you begin the cleaning process, gather a few basic tools. Having everything at hand will make the job quicker and more efficient. You will need a paperclip or a thin piece of metal wire, like one from a twist tie, to precisely clear out the small burner ports. A small metal pin or needle can also be effective for this task.
For general cleaning of burner components, prepare a solution of mild liquid detergent and hot water. A soft brush, such as an old toothbrush, will be invaluable for scrubbing away stubborn food residue without damaging the burner parts. Finally, keep clean cloths or towels readily available for wiping and drying. While a fan can be optional for speeding up the drying process, it is not strictly necessary. It is crucial to avoid using wooden toothpicks, as they can break off inside the ports and create a more severe blockage. Similarly, harsh abrasive cleaners should be avoided, as they can damage the burner finishes.
Step-by-Step Guide: How to Safely Clean Your Gas Burner Ports
Tackling clogged gas burner ports is a task that requires careful attention to detail and safety. Follow these steps to ensure a thorough and safe cleaning process, restoring your stove’s performance.
Step 1: Prioritize Safety – Always Start with a Cool Stove
|
Our Picks for the Best Gas stove in 2026
As an Amazon Associate I earn from qualifying purchases.
|
||
| Num | Product | Action |
|---|---|---|
| 1 | Gas One Portable Butane Camping Stove with Case: Automatic Ignition, Precise Heat Control - Camping & Tailgating and Outdoor Cooking |

|
| 2 | GasOne High Pressure Single Propane Burner - Outdoor Cooking with Heat Shield and Guard – Propane Burner Head for Camping, Tailgating, Seafood Boil, Home Brewing - Patented |
|
| 3 | Vivicreate 2 Burner Propane Stove, [20000 BTU] Portable Camping Gas Cooktop with Auto Ignition, Stainless Steel Outdoor Cooker with Regulator & Hose for RV, Backyard, Camping and Emergency Use |
|
| 4 | Horynar Propane Stove 2 Burner Gas Stove Auto Ignition 26000 BTU Tempered Glass Propane Burner LPG with CSA Hose for Outdoor Cooking, Emergency |
|
| 5 | GE 30-Inch Freestanding Gas Range with 4 Sealed Burners, Standard Clean Oven, Black |
|
| 6 | GasOne 200K BTU Propane Burner – Heavy-Duty Propane Stove – Outdoor Burner with Adjustable 0-20Psi Regulator and Steel Braided Hose – Ideal for Home Brewing, Turkey Fry |
|
| 7 | Gas One GS-3400P Propane or Butane Stove Dual Fuel Stove Portable Camping Stove - Patented - with Carrying Case Great for Emergency Preparedness Kit |
|
| 8 | Vivicreate High Pressure Propane Gas Outdoor Camping BBQ Grill Stove Burner Estufas de Gas para Cocinar Afuera Es gas propano Regulator 20 PSIG |
|
| 9 | Gas One Propane Double Burner Two Burner Camp Stove Outdoor High Pressure Propane 2 Burner Adjustable PSI Regulator and 4ft Hose With Removable Legs |
|
| 10 | AMZCHEF 17 Inch 3-Burner RV Gas Range with 1.24 Cu.Ft Oven, High Output Propane Stove for Mobile Home, Camper, Apartment, Stainless Steel |
|
Before you touch any part of your gas stove for cleaning, always ensure it is completely cool to the touch. Attempting to clean a hot stove can lead to serious burns. For comprehensive cleaning or if you are unsure about any steps, it is a good practice to turn off the main gas supply valve to your stove. This step adds an extra layer of safety, especially if you plan to clean near gas lines or orifices. Never proceed with cleaning if you detect any gas odor; instead, immediately ventilate the area and contact your utility provider or fire department.
Step 2: Disassemble the Burner Components
Once your stove is cool and safe to handle, begin by carefully removing the individual burner components. Start by lifting off the heavy burner grates that sit on top of the cooktop. Next, gently lift off the burner caps, which are typically round and sit directly on the burner heads. Finally, carefully remove the burner heads themselves. These are usually metal rings with small holes where the flames emerge. Place all removed parts on a clean towel to keep them organized.
Step 3: Thoroughly Clean Burner Caps and Heads
With the components disassembled, it’s time for a good cleaning. For heavily soiled burner caps, create a solution of warm water and mild liquid detergent. Submerge the caps in this solution and allow them to soak for 20 to 30 minutes. This helps loosen baked-on food and grease. After soaking, use a soft brush, like an old toothbrush, to gently scrub away any remaining residue. For the burner heads, wipe down their surfaces and the grooves with a damp cloth, ensuring all visible dirt and grease are removed. Once cleaned, rinse all parts thoroughly with clean water and allow them to air dry completely. Ensuring they are bone dry before reassembly is critical to prevent ignition issues.
Step 4: Unclog the Burner Ports and Orifice
This is the most crucial step for restoring even flames. Take a straightened paperclip or a thin piece of metal wire and carefully insert it into each tiny flame hole, or burner port, located around the circumference of the burner head. Gently wiggle the wire inside each port to dislodge any accumulated food particles, grease, or debris. Make sure to poke through every single hole. Additionally, clean any debris from the central orifice opening, which is typically located beneath the burner head where the gas tube connects. This ensures proper gas flow.
Step 5: Clean the Igniter (Spark Electrode)
The igniter is the small ceramic component that creates the spark to light the gas. If it’s covered in residue, it might struggle to spark effectively. Gently wipe the igniter with a clean, damp cloth to remove any soil, grease, or carbon buildup. Be careful not to use excessive water, and ensure it is completely dry before proceeding. A clean igniter is essential for reliable ignition and consistent burner performance.
Step 6: Reassemble and Test Your Burners
Once all parts are thoroughly cleaned and completely dry, it’s time to reassemble your stove. Carefully place each burner head back onto its designated spot, ensuring it is properly seated and aligned. Next, position the burner caps correctly over the burner heads; improper alignment can lead to uneven flames or ignition problems. Finally, replace the burner grates. With everything back in place, turn the gas supply back on if you had turned it off. Then, test each burner individually to confirm that you now have a strong, even, and blue flame across all ports.
Preventing Future Clogs: Maintenance Tips for a Healthy Gas Stove
Consistent maintenance is key to keeping your gas stove’s burner ports clear and its flames even. The simplest and most effective prevention strategy is to clean up spills immediately as they occur. Food and liquids that boil over or splatter can quickly dry and harden, leading to stubborn clogs if not addressed promptly.
Beyond immediate cleanup, make it a habit to wipe down your stovetop surfaces and remove and clean your burner caps weekly with soapy water. This routine cleaning prevents residue buildup. For a deeper preventative measure, perform a monthly cleaning of your burner ports using a paperclip or metal pin, as outlined in the steps above. Always ensure that burner caps are properly aligned after any cleaning or cooking, as misalignment can hinder proper gas flow. Using appropriate cookware that fits your burner size can also help minimize boil-overs and spills, contributing to a cleaner, healthier gas stove.
Troubleshooting Common Issues and When to Call a Professional
Even with regular cleaning, you might encounter situations where your gas stove isn’t performing as expected. If you experience persistent uneven flames, clicking noises that don’t stop, or a burner that simply won’t ignite after thoroughly cleaning the ports, it might indicate a more complex underlying issue. These could include a damaged igniter that needs replacement, issues with low gas pressure, a clogged gas line deeper within the appliance, or even electrical problems with the ignition system itself.
In such cases, it’s wise to consider calling a professional appliance technician. Crucially, if you ever smell gas, whether while cleaning, operating, or even when the stove is off, immediately turn off the gas supply, evacuate your home, and contact your gas utility provider or local fire department from a safe location. Do not attempt to troubleshoot or operate any electrical switches. As an industry expert notes, “For persistent issues or suspected gas leaks, always prioritize safety and contact a certified appliance technician. Some problems require specialized tools and expertise to diagnose and repair safely.”
Conclusion
Maintaining clear gas burner ports is a fundamental aspect of owning a gas stove, directly influencing both your cooking efficiency and the safety of your home. By understanding the common causes of clogs and following a few simple, routine cleaning steps, you can prevent frustrating uneven flames and potential hazards. Regularly clearing debris with a paperclip, washing burner components, and ensuring proper reassembly are easy DIY tasks that will keep your stove performing at its best. Embrace these maintenance habits to ensure your gas stove delivers reliable, even heat for every meal, keeping your kitchen both productive and safe. What steps will you take today to ensure your gas stove always delivers a perfect, blue flame?
Frequently Asked Questions
What does a healthy gas flame look like?
A healthy gas flame is primarily blue with a small, distinct inner cone of darker blue. This indicates efficient combustion of gas. Yellow or orange tips, flickering, or uneven distribution often signal an issue with the gas-air mixture, typically due to clogged burner ports or other obstructions.
Can I use a wooden toothpick to clean burner ports?
No, it is strongly advised to avoid using wooden toothpicks to clean burner ports. Wooden toothpicks are brittle and can easily break off inside the small burner holes, creating a more severe and stubborn blockage that is difficult to remove. Instead, opt for a metal paperclip, a thin wire, or a small metal pin.
How often should I clean my gas burner ports?
For optimal performance and to proactively prevent clogs, it is recommended to perform a deeper cleaning of your gas burner ports with a paperclip or metal pin monthly. Additionally, wiping down surfaces and cleaning burner caps weekly, along with immediate cleanup of spills, will contribute significantly to maintaining clear ports.
What causes a yellow or orange flame on a gas stove?
Yellow or orange flames on a gas stove typically indicate incomplete combustion. This is most commonly caused by clogged burner ports, which restrict the proper flow of gas and prevent it from mixing adequately with air. Other factors like excess moisture, grease, or even insufficient oxygen in the kitchen can also contribute to this issue.
Is it dangerous if my gas stove flames are uneven?
Yes, uneven flames, particularly those with a significant yellow or orange presence, can be dangerous. They signify incomplete combustion, which has the potential to produce carbon monoxide—a hazardous, odorless, and colorless gas. While minor unevenness might only impact efficiency, persistent or prominent yellow/orange flames warrant immediate attention for safety.
What should I do if I smell gas while cleaning or operating my stove?
If you detect the smell of gas at any point, immediately turn off the main gas supply to your stove if it’s safe and easily accessible. Extinguish any open flames, ventilate the area by opening windows and doors, and calmly exit your home. From a safe distance, call your gas utility provider or local fire department. Do not operate light switches, use phones, or do anything that could create a spark.
